Are you a blogger looking for how to start an email list from scratch? I will walk you through the entire process of setting your business for email marketing so that you can make more money.
Starting an email list as a new blogger from scratch can seem overwhelming and confusing, but it’s one of the most valuable investment you can make for your blog even as a beginner.
Contents
Reasons Why You Should Start An Email list
1. You own your email list.
Of every other social media platforms out there like Facebook, Instagram, Pinterest, Twitter etc. You do not own them and so cannot control what happens and how your audience can be reached. But your email list and website are the two personal assets of a blogger and an online business owner.
2. Email list is personal.
Because email is personal it gives you the opportunity to reach your audience personally without much interference from all the noise going on on all other social media platforms and in the world in general. Generally people read their emails at a convenient time. So they can read your email and even respond to you if they have questions.
3. Email is Targeted
Your email list captures a group of people who are interested in your brand and what you’re offering, so your email list is targeted and you can deliver to them relevant offers and get good results.
4. More people use their emails.
More people read their emails several times a day. Take yourself as an example, you definitely check your emails a few times a day so that you don’t miss important messages. And every internet user has atleast one email account.
And a research conducted by Radicati discovered that there are 3.8 billion email accounts.
5. Monetization
If you want to monetize your blog, having an email list is a great asset because you would have built trust with your email subscribers, and so they will easily buy from you.
So are you ready to start your email list and make more money from your blog? I will show you how to start an email list in 30 minutes.

So let’s get started.
How To Set Up Your Email List
The first step to setting up your email list to choose an email provider.
When I first created my website, I started with mailchimp and after much frustration, I finally switched to Convertkit and I couldn’t be much happier for choosing convertkit.
Reasons Why I Use Convertkit
- Convertkit is very easy to set up. I am all for simplicity, and convertkit worn me over with this one.
- You can design beautiful forms with ease from the many free templates. You simply need to change the colors and images if you want the forms to reflect your brand.
- You can segment your audience with ease.
- Convertkit is designed for bloggers and creators
- Convertkit offers a free plan for up to 1000 subscribers and you can access it by signing up through this link.
- The free plan offers almost all the features of the paid except one (sequence).
So let’s set up your convertkit account today.
Step 1. Sign Up For Convertkit
Sign up for convertkit (Here’s the link to sign up for the free plan)
You only need to take a few steps which are pretty easy to sign up for a convertkit account. You need your email address and a password to do so.
Step 2. Create A Form
The next thing you need to do is to create a form
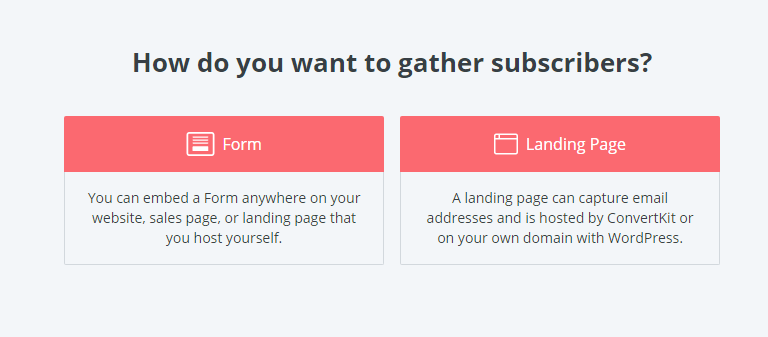
This is a sign up form that you can embed anywhere on your blog or website. To create a form, click on the “Landing Pages Forms” tab on the top navigation menu, and then click on “Create New” Button. And you will see a screen like the one below. Click on the “form” button and you see some beautiful templates that you can easily customize by simply changing the colors and images to your brand own.
To place this form on your website or blog, go to your Form > settings > Embed and grab the code there, and then paste it in a widget area or HTML editor on your blog.
Step 3. Create A Sequence
After creating your form, the next thing you should do is to create a sequence in convertkit. The sequence is what your subscribers will receive after they sign up to your email list.
As a beginner, you just need only one email in your sequence, so no need to overthink it. And this is your welcome email and should contain the following:
- An introduction of yourself and what you do
- A link to download the incentive
- A thank you for subscribing
- And what they can expect from you as your subscribers.
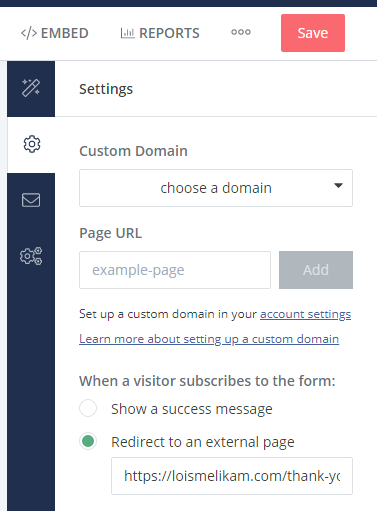
NOTE: If you’re currently on the free plan, the automated sequences is one feature that you don’t have access to until you upgrade. But you can still deliver your optin to your subscribers by directing them to a page to on your blog with a link to download the optin incentive.
You can do that on your opt-in form settings. Simply select “Redirect to an external page” and create a page on your blog with a link to download the opt-in incentive.
Step 4. Link Your Form To Your Sequence
After creating a form and a sequence, now you have to link the two of them with an Automation.
Create a new automation and select “Joins a Form” as the first event. Select the form that you just created.
Next, add an action. “Add the subscriber to email sequence” and select the sequence that you just created.
Finally publish the automation, by toggling the botton in the top right corner of the screen to live.
Once you have completed this, your form and sequence will be linked.
How To Send Newletters In Convertkit
To send newsletters to your subscribers, just click on “Broadcast”. It is at the top of your navigation menu in your convertkit account. In convertkit, newsletters are called braodcast, so don’t be confused.
Ideally you should send weekly newletters to your subscribers so that you can establish trust and build a relationship with them.
So that’s it, this is everything you need to know about on how to start an email list.
Don’t forget to sign up for Convertkit’s Free plan here and grow your email list for free for up to 1000 subscribers.


2 Comments