
Contents
A Step By Step Guide On How To Create A WordPress Website On A Budget In 120 Minutes
Learn how to create a WordPress Website On A Budget
Creating a website used to be a daunting task. Expensive and challenging.
Before now, if you need a website either for your business or for a personal website, you will need to hire a web developer, pay thousands of dollars and wait for months because everything had to be built from scratch.
Times have changed and creating a website has become much easier, less time-consuming, and cost-effective. I mean if you have a laptop with an internet connection, and follow the steps in this guide, you will create your own website.
Today you don’t need to write a line of code and I will show you how to create a WordPress Website On A Budget.
A Step by Step Guide On How To Create A WordPress Website On A Budget
If you’re worried about the technicalities of creating a website, or where to start, I will walk you through the entire process of creating a wordpress website on a budget and from scratch too.
You will be able to build a website for your business or a personal website today after reading this post.

3 Tools For Creating A Website
To create a website, you need just 3 basic tools: With these 3 tools you can create a WordPress Website On A Budget
- A Domain Name
- Hosting
- A Platform
A domain name is your address on the internet. Let’s say your street address. My website domain name is loismelikam.com
A Host keeps all the data and information of your site. So if a domain is your street address, then a hosting is your house.
A Platform is the place where your website is created.
Domain Name
Every website needs a domain name. It is like the street address of your house. So it will allow people to find you on the internet.
How To Find A Domain Name
To find a domain name, it will basically depend on what you want to use your website for.
Let’s say you want to create a personal website, you can use your name as your domain name. A combination of both your first name and your last name is a good choice.
You can also use a combination of your first name and a prefix or your last name and a prefix that reflects what your website is about.
You can also allow your creativity to flow when choosing a domain name especially if your building a personal website.
But if you want to create a website for your business, ideally you should use your business name as your domain name. This is easy peasy I guess.
Domain Name Tip
Your domain name ideally should look like this – https://yourdomain.com.
When it comes to domain name, there are few extensions. By extension I mean domain names ending in a .com, .org, .net etc. There are numerous extensions out there today, but make sure to choose between this 3 domain name extensions.
I will personally say try and use a domain name with the .com extension.
Hosting
So after choosing your domain name, the next thing you need to create a website is a host. A host primarily houses all your website data, all the photos, blog posts and everything you will be sharing on your website.
A host stores all the documents, images, data and files of your website.
Now you have seen how important a host is to the building of your site, it is important to choose a host that will make sure your website content stays life and always connected and made available to your readers at all times.
You can also buy your domain name and host from the same company.
Platform
WordPress
If you’re building your first website, I can tell you for a fact that you don’t need to write a line of code. And that is where website platforms such as WordPress comes in handy.
What Is WordPress?
WordPress is a content management system that provides the right tools and resources needed to create a website from scratch. From Templates and plugins to make building your website fun and easy.
WordPress is a great option to build a site when you don’t have any knowledge of code and no experience of web design as well. No complicated set up process involved.
Domain Name + Hosting Bundle
I use the all in one bundle to build my own website. This is like sharing my secret with you guys, but I want to see you succeed and earn money online from home, and this is my own way of making sure that you succeed.
I love and use the namecheap domain name + hosting bundle to build my clients websites and even my own websites. All my websites are currently hosted on Namecheap and of course I buy all my domains from namecheap as well.
Their customer service is top notch. They offer 24/7 support service and I have not had reason to regret.
With the Namecheap all in one service, you get to buy your domain name and hosting in one place and build your website seamlessly without any hassle.

3 Steps On How To Create A WordPress Website On A Budget
Step 1 – Select Your Web Hosting Plan
There are 3 hosting plans you can choose from:
- Stellar
- Stellar Plus
- Stellar Business
Depending on your needs, you can choose from any of the three hosting plans to create a WordPress website on a budget.
Did I forget to mention that one of the things I love about the namecheap hosting plans is that you can host at least 3 websites and more using the namecheap host.
With the Namecheap hosting plans, you can confidently create a WordPress Website on a budget
So if you want to build 3 websites, then the stellar plan will serve you perfectly, but if you want to build more than 3 websites, then the stellar plus or the stellar business plan is the ideal plan for you.
Namecheap is by far one the best hosting platforms that makes it easy to build a website and also budget friendly.
If you’re on a tight budget and need a good and reliable host, take my word for it, Namecheap is the best host for creating a wordpress website on a budget.
So let’s get started creating your WordPress Website On A Budget.
So first thing you go to Namecheap through this link and you will select your hosting plan first.
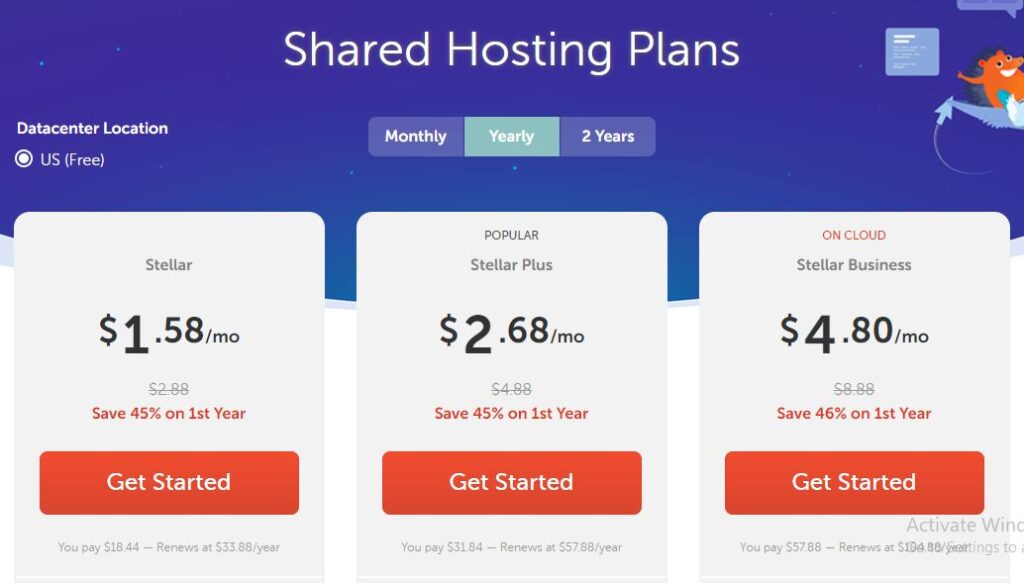
Now click on the Get Started button of any of the plans that you choose.
Step 2 – Domain Name Connection
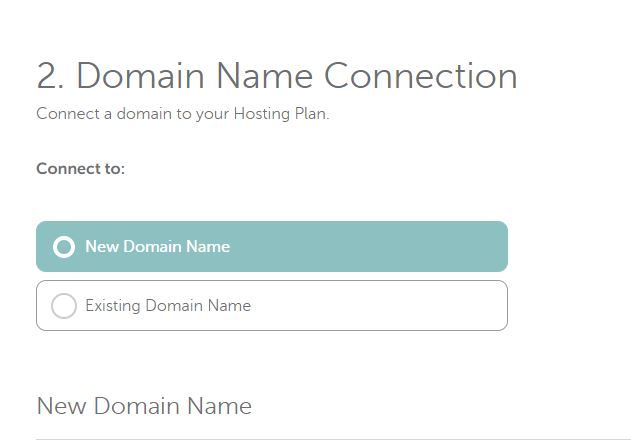
So here you’re to choose a new domain name or use an existing domain name if you don’t have anyone yet.
Depending on your choice, you select the right option and you will be prompted to add your domain name.
Let’s say your using a new domain name. You click on the New Domain Name, when you scroll down you will search for the domain name in the box provided and then click on “Connect to Hosting” and then click on “Add to cart”.
Domain name typically costs anything from $10-15 per year.
So when you search for your domain name and it’s available, click on the “Connect to Hosting” button, this will connect your domain name to the hosting plan you just choose. Then click on “Add to Cart”.
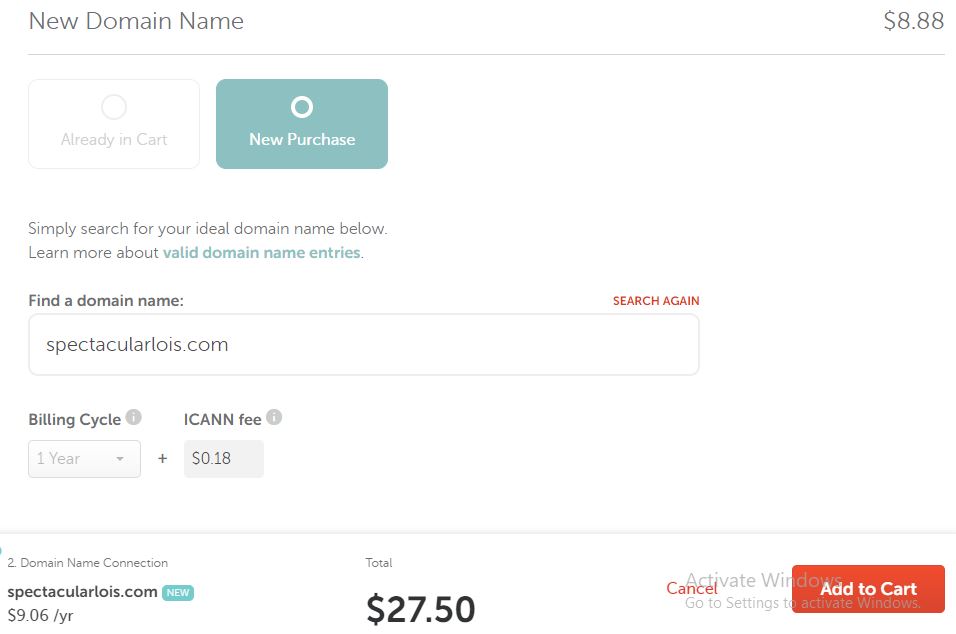
Once you have clicked on the “Add to Cart” button, next you will confirm your order by paying.
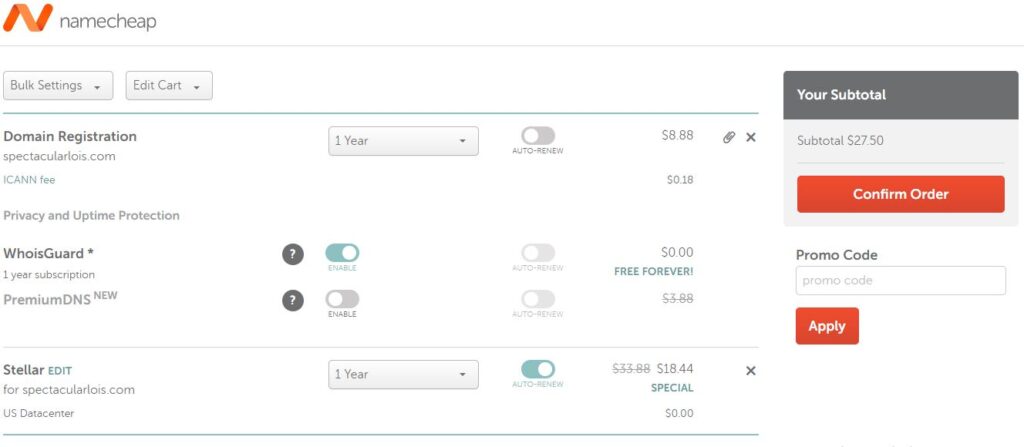
Once you click to confirm your order, next you will be prompted to login to your namecheap account if you already have an account and if you don’t have an account, you will need to sign up for a free namecheap account.
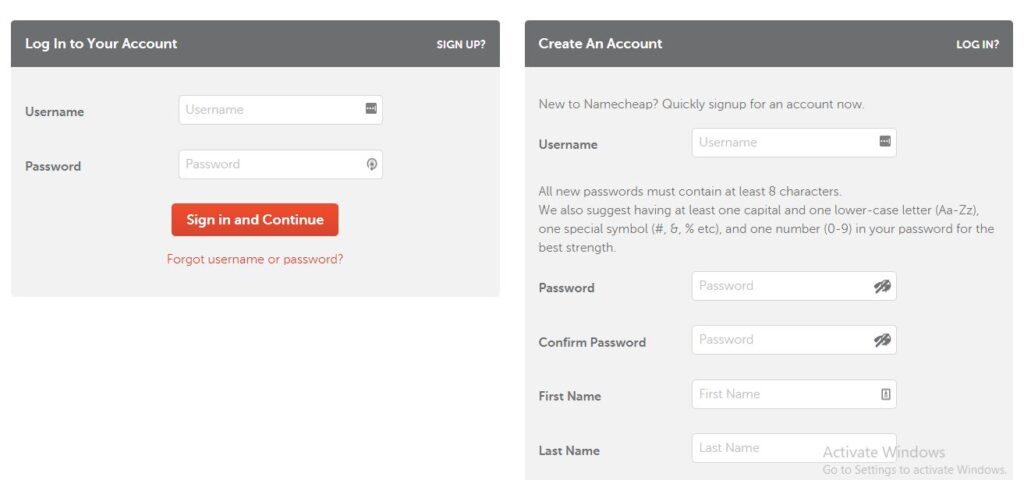
When you sign in into your account, you will add all your details including your payment details and then you pay for your package.
Right after making your payment, namecheap will send you an email ASAP with all the details of your transaction and your account details as well.
So check your email for an email from namecheap and view all your account details.
Now here’s the fun part, it’s time to install WordPress.
Install WordPress
To install wordpress, you will need to login to your cpanel. The link to your cpanel, is included in the email that namecheap sent to you. It will look like this – https://yourdomainname.com/cpanel.
Click on that link and login to your cpanel.
Now scroll down and let’s install wordpress together and start building your site.
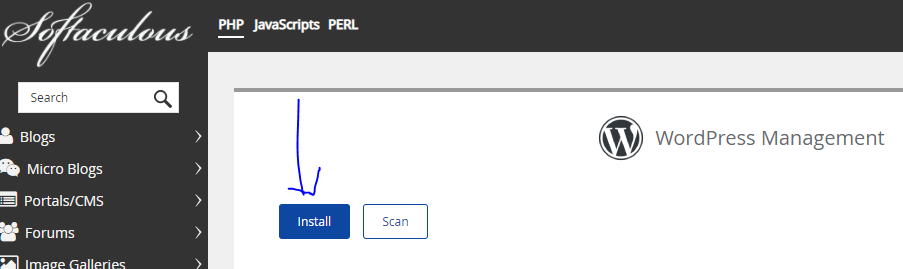
So from your Cpanel, scroll down to the software section and click on “WordPress Manager by Softaculous”.

Once you click on the “WordPress Manager By Softaculous”, you will be taken to the next screen where you will install WordPress.
Now click on Install as seen in the image below.
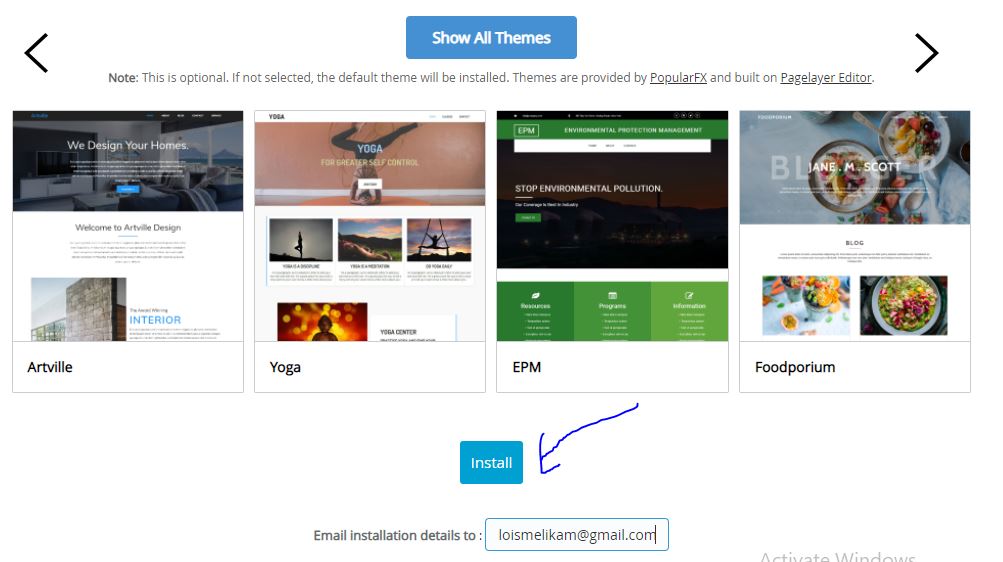
When you click on the “Install” button, you will see a screen like the one below. Now ensure that you install wordpress on the right domain name. Choose the installation URL. Also choose the right protocol. By protocol I mean either https or http.
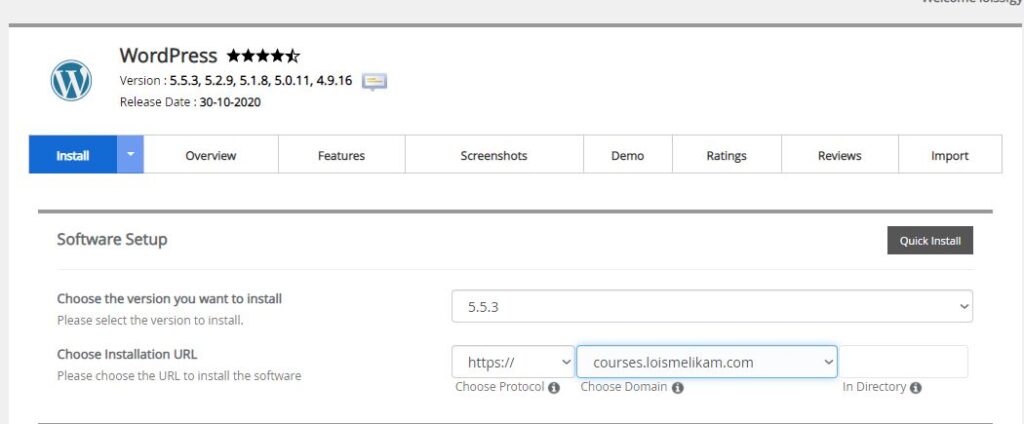
Then scroll down on the same page and click the install button.
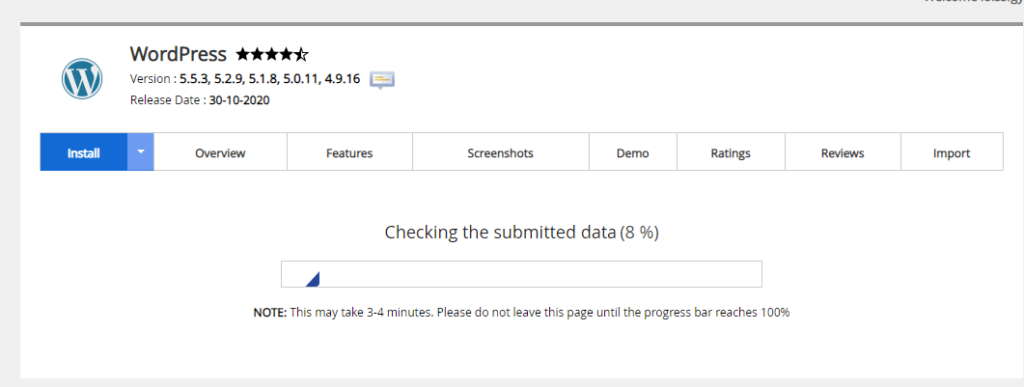
Once you click on the “Install” button, you will see a progress bar like the image below. It take a few seconds and wordpress will be completed installed.
When the WordPress installation is completed, you will see a congratulatory message like the one below.
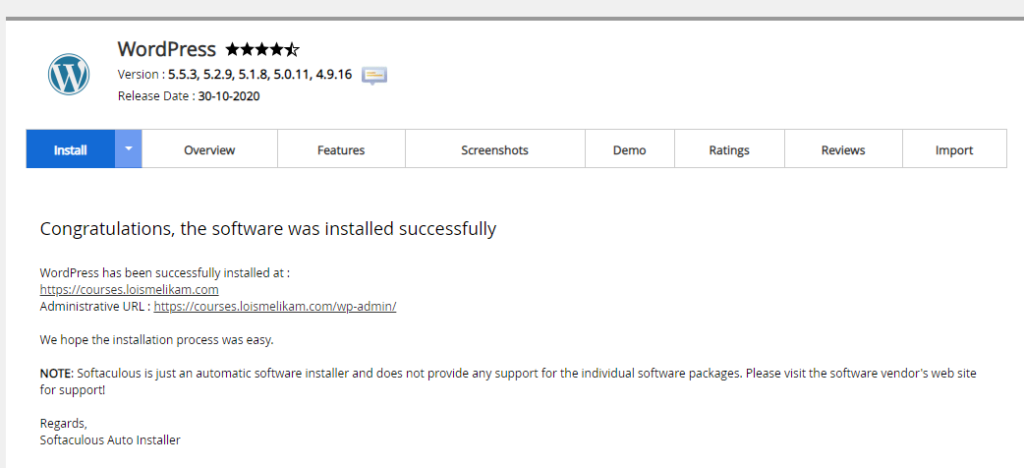
How To Login To WordPress
So right after installing wordpress, the next thing you should do is to login to your WordPress dashboard and install a WordPress theme.
To login to WordPress, click on the administrative url, that you got right after the installation. It is right there under the congratulatory message as shown in the image above.
To login to your wordpress dashboard, your administrative url will look like this https://yourdomainname.com/wp-admin. So simply add wp-admin to your domain name and it will take you to WordPress login window.
You will login to your wordpress dashboard using your username or email and password
Install WordPress Theme
After installing wordpress, the next thing you should do is to install a wordpress theme so that you can start building your website.
To install a wordpress theme, login to your wordpress dashboard, navigate to the panel on the left and click on “Themes” then click on “Add New” in the search box, search for the “Astra Theme” and install it.
Create Pages
After installing a wordpress theme, you should create atleast 5 relevant pages which includes
- Home
- Blog
- Contact
- About
- Work With Me
Add content to the pages and publish them.
How To Create Pages In WordPress
To create a page, from your WordPress dashboard, navigate to the left panel, and click on “Pages” then “Add New”.
Give your page a name, add the content of the page, when you’re done, hit the publish button at the top right corner.
Install WordPress Plugins
One of the reasons I love and use WordPress for all my sites and even my clients site is the great functionality that WordPress has.
With WordPress you can build any kind of website you want, whether ecommerce, business or personal site. The functionalities are many.
And it is plugins that have made it much easier to add more functionalities to your wordpress site.
Now, it is important that you know that WordPress has thousands of both free and paid plugins that you can install and use on your site.
How To Install WordPress Plugins
To install a wordpress plugin, from the backend of your WordPress dashboard, click on the “Plugin” at the left panel, then “Add New” and search for the name of the plugin that you need to install.
Once you the plugin is shown, click on the “Install” button and after the installation is complete, click on “Activate” and that’s it it’s done.
Install These Necessary Plugins
For a start, make sure you install the following plugins into your wordpress dashboard immediately.
- Yoast
- WPForms
- Google Analytics By MonsterInsights
- WordFence Security
- Updraftplus
Yoast Plugin
The Yoast plugin is a search engine optimization plugin. This plugin will help you to optimize your blog post effectively for search engines. It has bot the free paid version. You can purchase the paid version here.
WP Forms
The WP Forms helps you to create simple and beautiful forms that can be used on your site. You don’t need to learn to write any code. With this plugin, you can create as many forms as you need for your WordPress site.
Google Analytics By MonsterInsights
From day one, you need to start tracking how visitors get to your site so that you can maximize your user’s experience.
The Google Analytics Plugins helps you track your website visitors and also helps you to make better decisions about your website traffic.
To set up the Google Analytics plugin you need to follow the steps in this guide to do so.
WordFence Security
The WordFence Security is a plugin that protects your site from scammers and people that might attempt to login to your site.
So download the wordfence security plugin and protect your site from day one.
UpdraftPlus
The updraftplus plugin backs up the content of your site.
This is one of the most important plugins that you need on your site from day one.
With this plugin you can easily restore the content of your site, if you mistakenly delete them.
Create Blog Posts
As a website owner, you should start creating blog post and publishing on your site.
To create a blog post, click on “Posts” then “Add new” give your blog post a title, then write at least 1000 to 2000 words, after writing, hit the publish button at the top right corner.
Blog post is a great way to drive traffic to your website and attract the right audience for your site.
And it’s A Wrap
Whoop whoop, this was a long one indeed, I hope you enjoyed the process of creating your own website. I enjoyed writing this post because I want to see you create a website and build a side business of your own even if you are currently working a day job.
Congratulations are also in order for you, for taking the right step towards making money online.
If you have any question, don’t hesitate to ask me in the comment section below.
If you enjoyed this post, please share it with your friends.
Inasmuch I have website now I wish I met this article beforehand because it’s really an eye opener to me in almost all aspects of website building and I’m so grateful to the team that came up with it
Glad that this blog post has helped you tremendously. And thank you for stopping by..