Learn how to build a WordPress Website With Bluehost. Building your first website doesn’t have to be complicated or expensive. Bluehost makes the process straightforward for complete beginners, and one of its biggest perks is a free domain name for the first year when you choose a qualifying annual or multi-year hosting plan.
In this comprehensive guide, you’ll learn exactly how to build a professional WordPress website with Bluehost, from signing up and claiming your free domain to installing WordPress, customizing your site, adding essential plugins, and launching it live.
Follow these steps and you’ll have a fully functional website in under an hour.Ready to get started? Use this special link to claim the current Bluehost deal (including free domain):
Why Choose Bluehost for Your Website?
Bluehost is an officially recommended WordPress hosting provider. It offers:
- One-click WordPress installation
- Free domain name for the first year (on 12- or 36-month plans)
- Free SSL certificate (for secure HTTPS)
- User-friendly dashboard and AI tools to help beginners
- 24/7 support
- Affordable introductory pricing
The free domain is available for popular extensions such as .com, .net, .org, .blog, .online, .store, and many others (premium domains excluded). It must be claimed within 90 days of purchase and renews at the regular rate after the first year.
What You’ll Need Before Starting
- A computer or laptop with internet access
- An email address you check regularly
- A payment method (credit/debit card)
- A rough idea of your website purpose (blog, business site, portfolio, online store, etc.)
- Domain name ideas (you can check availability during signup)
Total time for a basic site: 30–60 minutes.
Step 1: Choose the Right Bluehost Hosting Plan
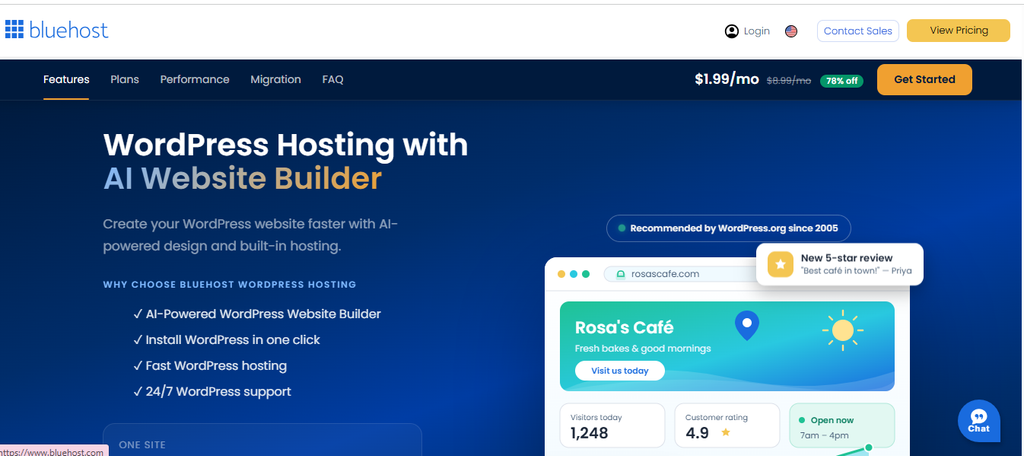
- Visit the special offer page of Bluehost Here
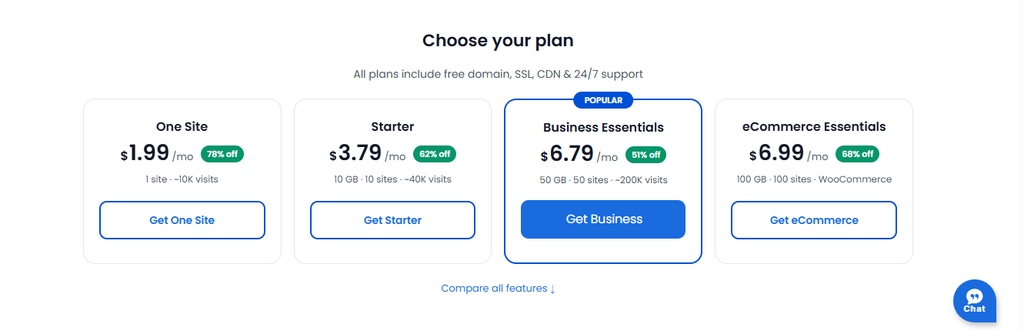
- Select a plan. For most beginners starting a single site or blog, the Basic or Starter plan is sufficient. Higher tiers (Choice Plus / Business or Online Store) offer more storage, websites, backups, and e-commerce tools.
Tip for maximum savings: Choose a 36-month term for the lowest monthly rate and to qualify for the free domain.
Click “Select” or “Choose Plan” on your preferred option.
Step 2: Claim Your Free Domain NameDuring checkout you’ll reach the domain selection screen.
- Search for your desired domain (e.g., yourname.com or yourbusinessblog.com).
- If it’s available, select it—Bluehost will apply the free domain offer automatically for eligible plans and extensions.
- You can also transfer an existing domain or use a temporary domain and add a permanent one later.
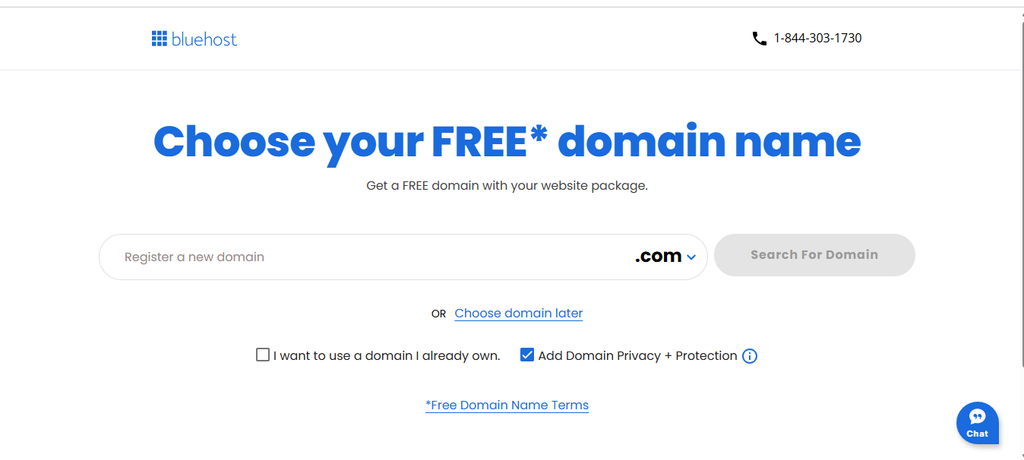
Domain search box on Bluehost signup with “Free” badge next to available domain]Proceed to the next step once you’ve chosen your domain.
Step 3: Complete Account Creation and Checkout
- Enter your account details (name, email, address, phone).
- Review the package term (stick with 12 or 36 months for the free domain).
- Carefully review the add-ons. Most beginners can uncheck extras such as premium security, backups, or marketing tools for now—you can add them later if needed. Keep free SSL if offered.
- Enter payment information and complete the purchase.
After payment, set a strong password for your Bluehost account. You’ll receive a confirmation email with login details.
Step 4: Log In to Your Bluehost Account and Install WordPress
- Go to bluehost.com and log in (or use the link in your welcome email).
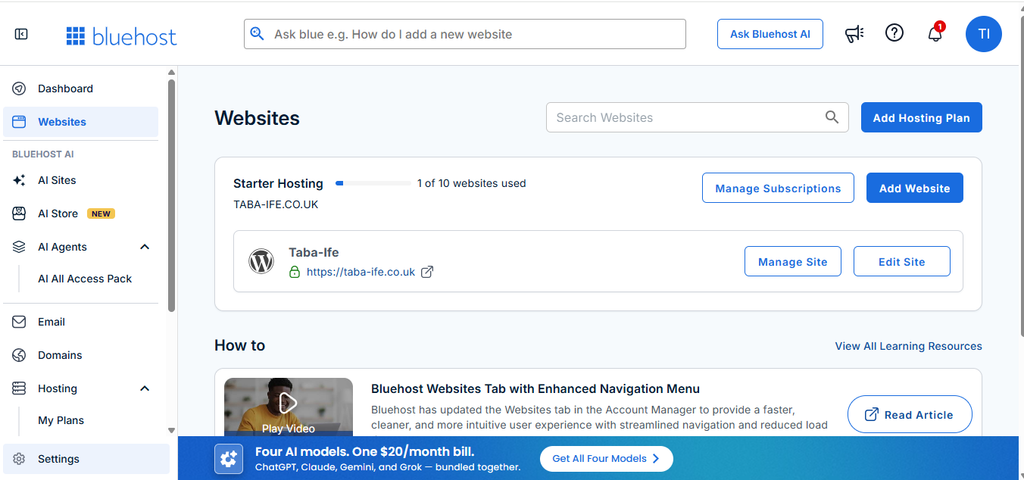
- In the Bluehost Portal (dashboard), click Websites in the left-side menu.
- Click Add Website.
- Select WordPress.
Bluehost will automatically install WordPress for you—no manual downloads, FTP uploads, or database creation required. The process usually takes under a minute.[Image placeholder:
Once installed, you’ll see options to:
- Use the AI Site Creator (recommended for beginners) to generate a starting design based on your site type, title, and description
- Import an existing WordPress site
- Or start with a clean install
Choose AI Site Creator if you want quick results, or proceed manually.
Step 5: Access Your WordPress Dashboard After installation:
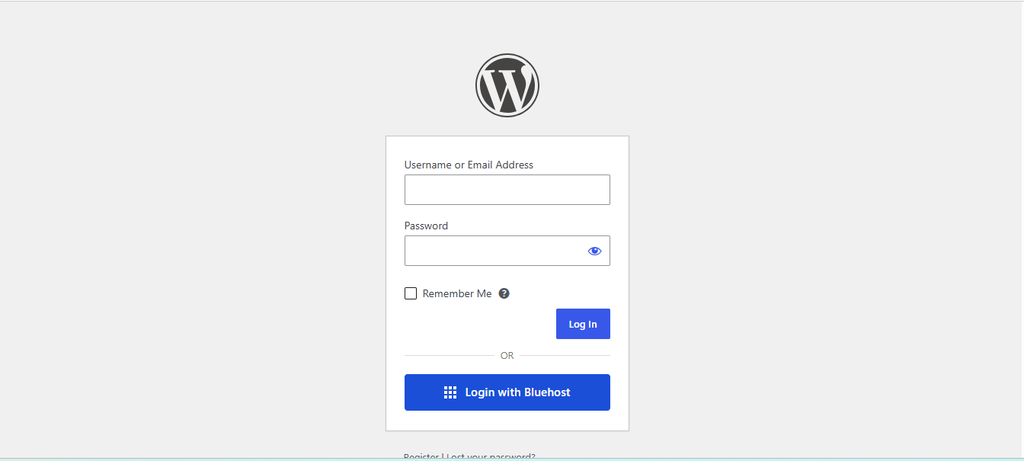
- From the Bluehost Websites section, click Log into WordPress (or visit yourdomain.com/wp-admin).
- Log in with the credentials provided (or the ones you set).
You’ll land in the WordPress admin dashboard the control center for building and managing your site.
Step 6: Essential First Settings in WordPressMake these quick changes right away:
- Go to Settings → General. Update Site Title and Tagline. Set the correct time zone.
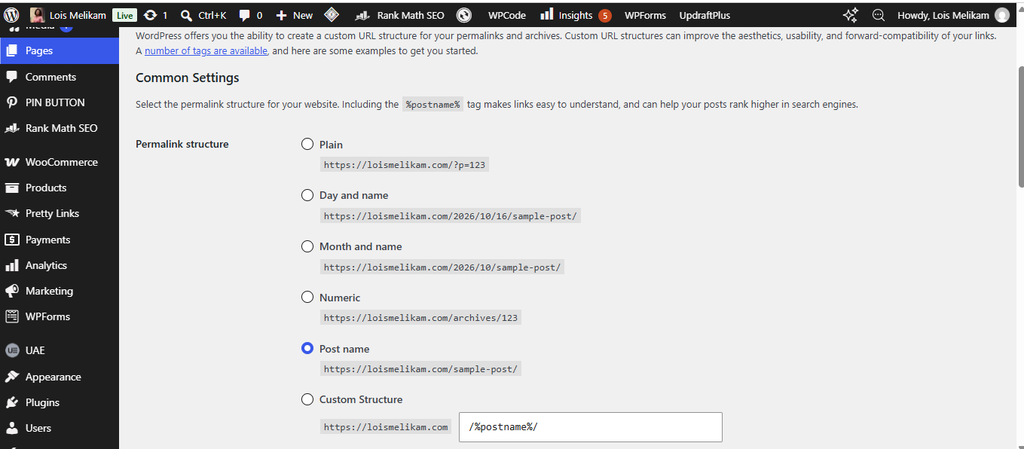
- Go to Settings → Permalinks. Select Post name (best for SEO) and save.
- Go to Settings → Reading. Make sure “Discourage search engines from indexing this site” is unchecked.
- Confirm your site loads over HTTPS (Bluehost provides free SSL—look for the padlock in the browser).
Step 7: Choose and Customize a Theme
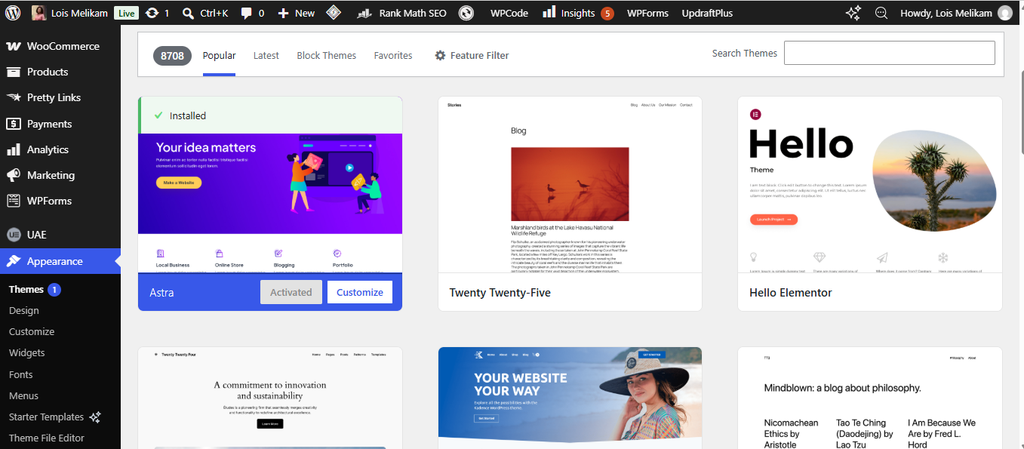
- Go to Appearance → Themes.
- Click Add New. Browse free themes or try popular beginner-friendly options such as Astra, GeneratePress, Kadence, or the default Twenty Twenty-Four / Twenty Twenty-Five themes.
- Hover over a theme and click Activate.
- Use Appearance → Customize (or the Site Editor for block themes) to change colors, fonts, logo, header, and footer.
You can also install a page builder plugin later (Elementor is popular and beginner-friendly) for drag-and-drop design.
Step 8: Create Your Essential Pages
- Go to Pages → Add New.
- Create these core pages:
- Home
- About
- Contact (add a simple contact form plugin later if needed)
- Privacy Policy / Blog (if relevant)
- Use the block editor to add headings, paragraphs, images, buttons, and lists.
- Publish each page.
- Go to Appearance → Menus (or the Site Editor) to create a navigation menu and assign it to the primary location.
Step 9: Install Must-Have Plugins
Go to Plugins → Add New and install these essentials (search and click Install → Activate):
- Yoast SEO or Rank Math – for on-page SEO
- Wordfence or Sucuri – basic security
- UpdraftPlus – backups
- Contact Form 7 or WPForms – contact forms
- LiteSpeed Cache or WP Super Cache – performance (Bluehost often has caching tools)
Keep the number of plugins low at first to maintain speed.[Image placeholder: Plugins page showing search results for Yoast SEO]
Step 10: Add Content, Optimize, and Launch
- Create your first blog post under Posts → Add New.
- Optimize images (compress before uploading and add alt text).
- Use your SEO plugin to write good titles and meta descriptions.
- Preview your site on desktop and mobile.
- Test forms and links.
- Once ready, your site is live at your domain!
Bluehost’s free SSL ensures it loads securely with HTTPS.
Quick Tips for Ranking Well and Growing Your Site
- Write helpful, original content regularly.
- Use clear headings (H2, H3) and short paragraphs.
- Optimize images and enable caching for speed.
- Submit your sitemap (via Yoast or Rank Math) to Google Search Console.
- Build internal links between related pages/posts.
- Focus on user experience—fast loading, mobile-friendly design.
Frequently Asked Questions – How to build a WordPress Website With Bluehost
Does Bluehost really give a free domain?
Yes—for the first year on 12- or 36-month plans. It renews at standard rates afterward.
Do I need coding skills?
No. WordPress with Bluehost is designed for beginners.
How long does setup take?
Most people finish a basic site in 30–60 minutes.
Can I change my theme or domain later?
Yes. Themes can be switched anytime. Domains can be managed or transferred in your Bluehost account.
What if I get stuck?
Bluehost offers 24/7 chat support, and the WordPress community has extensive free resources.
Start Your Website Today. Building a website with Bluehost is one of the easiest and most cost-effective ways for beginners to get online. With a free domain for the first year, one-click WordPress installation, and helpful AI tools, you can go from zero to live site faster than you think.
Click here to claim your Bluehost deal and free domain now
Once your site is live, keep learning, publishing content, and improving it. Your online presence starts with that first step take it today!
Read also: How I started my business while working a full time job
Please share this post.